How to configure Tibbo DS manager
The IC1000IP+JX/IC500IP+ controller is supplied with a TCP/IP socket on board, allowing it to be assigned an IP address and so added to a TCP/IP network.
In order to connect the IC1000IP+JX/IC500IP+, plug one end of a standard RJ45 network cable into the socket, and the other either into your router/hub, or directly into the Ethernet socket on a PC. The controller will then appear on the network.
Before it can be used, however, the controller must be configured via the application DS Manager.
You can download tibbo toolbox from here:
To configure the controller, start Tibbo DS Manager.
A window will appear:
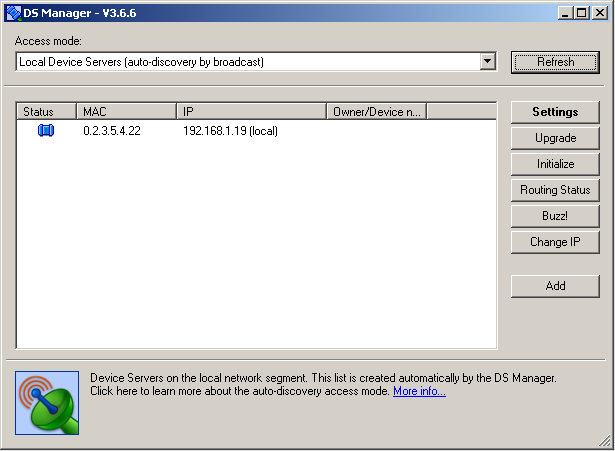
In the main panel of the window will be a list of all currently detected TCP/IP controllers.
It is almost certainly the case that your IC1000IP+JX/IC500IP is new, and so has a default IP address.
This, along with some others, will need to be changed.
Settings
Click on the visible TCP/IP controller to select it, then click on the Settings button at the top of the window to bring up the configuration window.
There are a series of tabs running across the top of the window.
Using the tabs you will need to locate the following settings and change them:

Once changed, click Ok to return to the main window.
The IC1000IP+JX/IC500IP is now configured and its status icon – represented by the blue plug to the left - should be solid and clear (as in the screenshot).
The controller is now ready to communicate with the software.
Important!
- When assigning an IP address, it is vital that you choose one that will be compatible with your existing network/PC.
- In most cases, this will mean using the first, second and third sets of digits from your PC/router, and making the last set unique.
For example, an IC1000IP+JX controller is plugged into a router with IP address: 192.168.1.10
The controller’s IP address should therefore 192.168.1.XXX, where XXX is any unique number (in the above screenshot, 19). It is vital that IP addresses do not share the same numbers.
For further assistance, please consult whoever manages the PC network at the installation site, or contact Sensor’s technical support department.
If you are intending to use Biometric readers, the baud rate should be set to ‘5-38400 bps’.
The Tibbo toolbox contains a Virtual Serial Port [VSP] for directing TCIP communication over serial.
This can be accessed and configured with the VSP manager.
Was this article helpful?
That’s Great!
Thank you for your feedback
Sorry! We couldn't be helpful
Thank you for your feedback
Feedback sent
We appreciate your effort and will try to fix the article