Using QR Readers with Other Access Control Systems
A QR code is simply an encoded number. It provides a machine-readable representation of a unique identifier that can be scanned by a compatible device. When scanned, the encoded number is decoded and passed to the relevant system, which uses it to identify or retrieve the associated record or information. The QR code itself is only a representation of the identifier and does not store or process the underlying data.
You can use an online QR code generator (e.g QRcode.tec )or an AI assistant to create a QR code that contains a specific number. For example, the QR code shown below encodes the number 1234 and can be used for testing purposes:
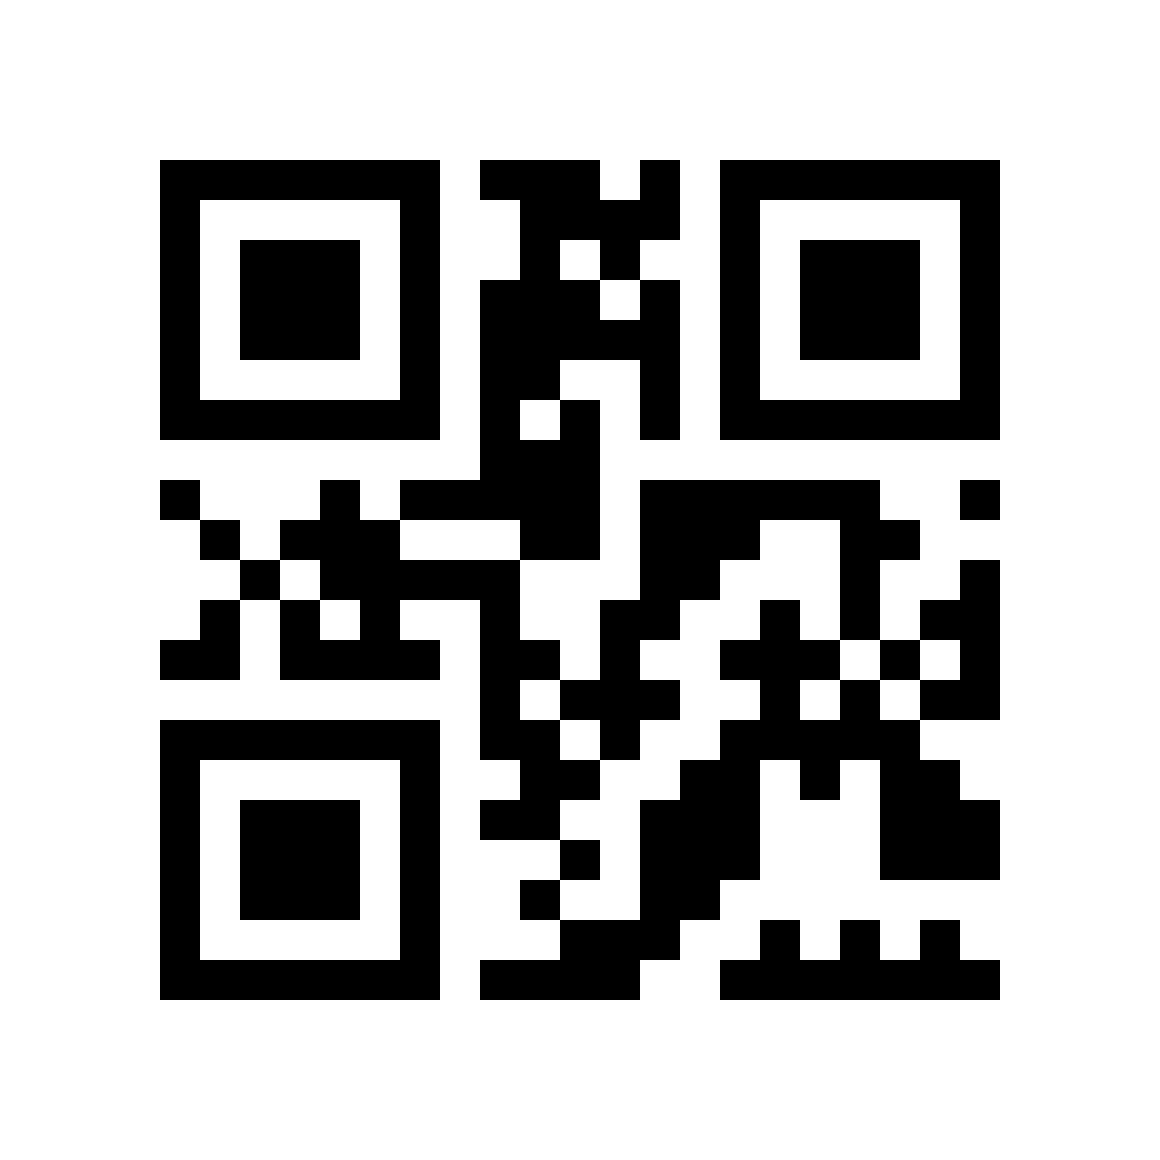
When a QR code is scanned, the reader decodes the encoded number, converts it into a Wiegand signal, and sends it to the Access Control Software. The Access Control Software does not inherently recognise the number or know who it belongs to. Before the QR code can be used for access, the encoded number must be associated with a token and assigned to a person within the system.
If using Paxton Net2
- Confirm whether your reader is the 26-bit or 34-bit version. This information is typically shown on the reader packaging.
If you are using a 34-bit reader, create one of the following custom card formats in Net2:
Xaaaaaaaaaaaaaaaaaaaaaaaaaaaaaaaax
orAaaaaaaaaaaaaaaaaaaaaaaaaaaaaaaa
Alternatively, you can use the standard 26-bit Wiegand card format available in Net2.- After configuring each format, scan the test QR code and check the Net2 event log or transaction history to determine whether the token number 1234 is displayed. If required, Paxton Support can confirm where unrecognised token numbers are shown within Net2.
- Use the card format that correctly displays 1234. Create or select a user in Net2, assign 1234 as their token number, and configure the appropriate access permissions.
Once the token has been assigned, Net2 will recognise the QR code when it is scanned and grant access according to the permissions assigned to that user.
Further information is available in the attached article and the video below.
If using Gallagher
First, confirm whether the QR reader is the 26-bit or 34-bit version. This information is normally shown on the reader packaging or product label.
The card format configured in Gallagher must match the Wiegand output of the reader. The settings below are an example for a 34-bit reader:
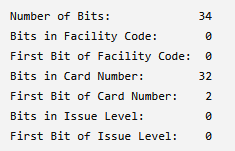
When Bits in Facility Code is set to 0, Gallagher will ignore the First Bit of Facility Code setting. The same principle applies to the issue level: when Bits in Issue Level is set to 0, the First Bit of Issue Level setting is ignored.
Once the card format has been created, assign it to the controller associated with the relevant door.
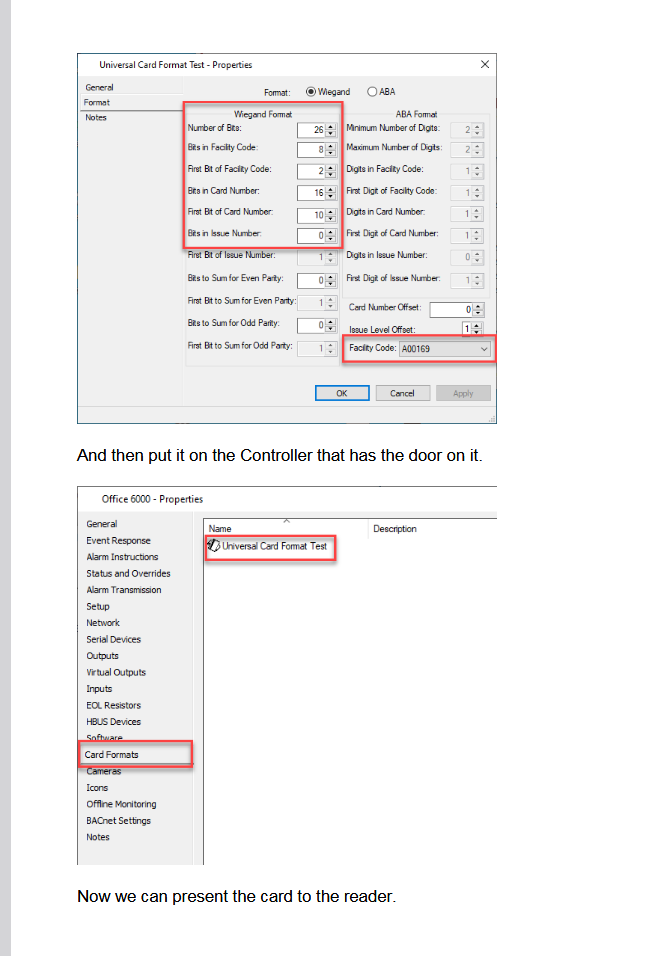
Gallagher is now identifying the credential correctly. The remaining step is to add or assign the credential to the appropriate cardholder and configure their access permissions.
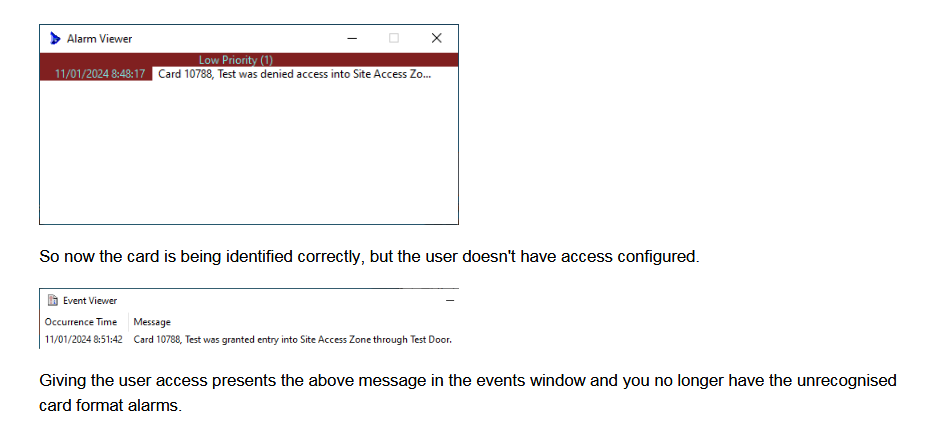
Once the cardholder has been given the correct access, the event should change to an access-granted message.
Was this article helpful?
That’s Great!
Thank you for your feedback
Sorry! We couldn't be helpful
Thank you for your feedback
Feedback sent
We appreciate your effort and will try to fix the article