GuardPoint 10 Automating Cardholder Management Using GPFusion
TABLE OF CONTENTS
- Introduction
- Understanding the config.ini File
- Ways of Running GPFusion
- Graphical (GUI) Execution
- Using GPFusion via Command Line (CMD)
- Creating Custom Commands Using Batch (.bat) Files
- Scheduling and Automating GPFusion Execution
- Summary
Introduction
The GPFusion tool provides a simple and flexible way to automate the creation, invalidation, and deletion of cardholders in GuardPoint 10 using spreadsheet data. Rather than relying on a fixed HR export format, the tool can work with any Excel file, provided the column structure matches the mappings defined in its configuration file.
At its core, GPFusion acts as a lightweight integration layer between external data sources (such as HR systems, payroll exports, or manually maintained spreadsheets) and GuardPoint 10, communicating via the GuardPoint 10 API. This makes it ideal for both one-off bulk operations and fully automated workflows.
Required modules: GP10-API
The GPFusion tool can be downloaded at the bottom of this article.
This guide walks through:
- Configuring the config.ini file and understanding field mappings
- Using GPFusion.exe from the command line with correct syntax
- Creating reusable .bat scripts for repeatable execution
- Automating execution via GuardPoint 10 Global Reflex (Run External Application)
- Automating execution via Windows Task Scheduler
- Common pitfalls (paths, quotes, spaces, directories vs files) and how to avoid them
By the end of this article, you should be comfortable testing GPFusion manually, turning those tests into automation-ready scripts, and integrating them cleanly into a live GuardPoint 10 environment.
Understanding the config.ini File
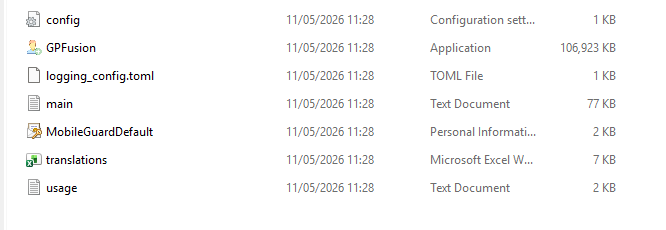
Download, unzip and open up the folder GP10FusionTool (zip file attached at the end of this article)
Open up the config file
GuardPoint 10 Connection Settings
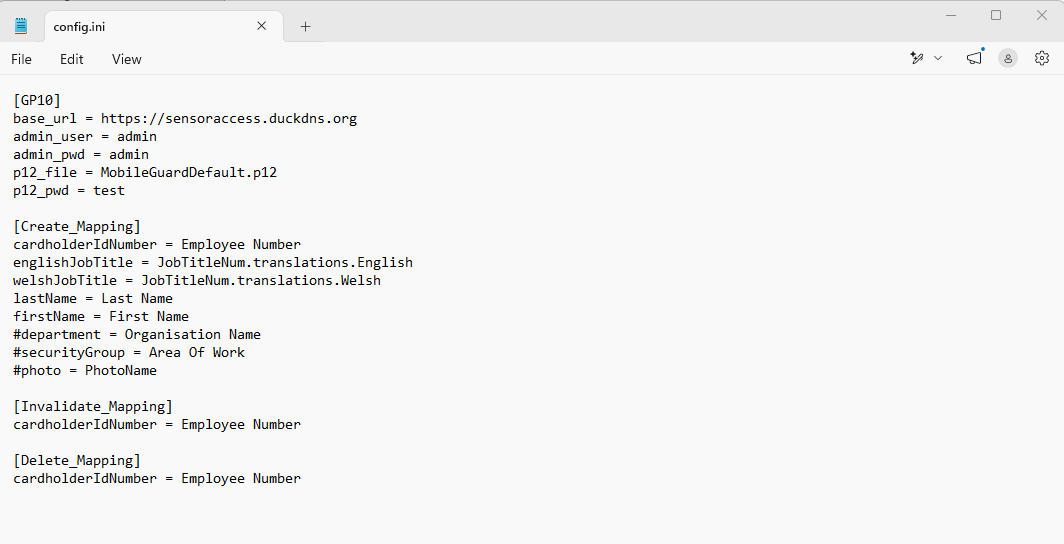
Typical example:
base_url
The URL of the GuardPoint 10 API endpoint.admin_user/admin_pwd
A GuardPoint 10 user with API access enabled.p12_file/p12_pwd
The client certificate used for secure API authentication (mTLS).
Important notes
The API must be licensed and enabled in GuardPoint 10.
The user must have “Allow API” set to YES in the Users screen.
Mapping Sections – How Excel Columns Become Cardholder Fields
The remaining sections define field mappings between Excel column headers and GuardPoint 10 cardholder properties.
Each operation type has its own mapping block:
How mappings work
Left-hand side
GuardPoint 10 internal field nameRight-hand side
Exact column header in the Excel file
Column names must match exactly (case-sensitive, spaces included) - however the Job Title should be JobTitleNum within your spreadsheet. Do not include the '.translations.English / .Welsh'This is why any spreadsheet can be used, not just a predefined HR template, as long as the column names align with the mappings.
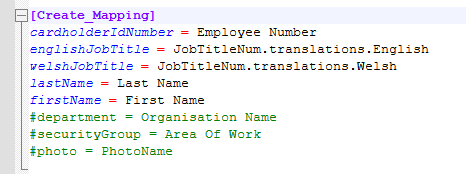
- Commented lines (
#) are ignored.
e.g in the screenshot below, 'department' will not be imported even if it is included on the spreadsheet: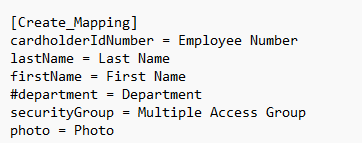
- Only mapped fields are processed
Any fields you want to be imported must be shown on the config file and not commented out (#) - Validated
We recommend using the Valid From and Expiration Dates rather than the 'Validated' flag. If you choose to use the Validated flag, then comment out the Valid From and Expiration Dates.
Ways of Running GPFusion
Once the config.ini file is correctly configured, GPFusion can be executed in two distinct ways, depending on the use case.
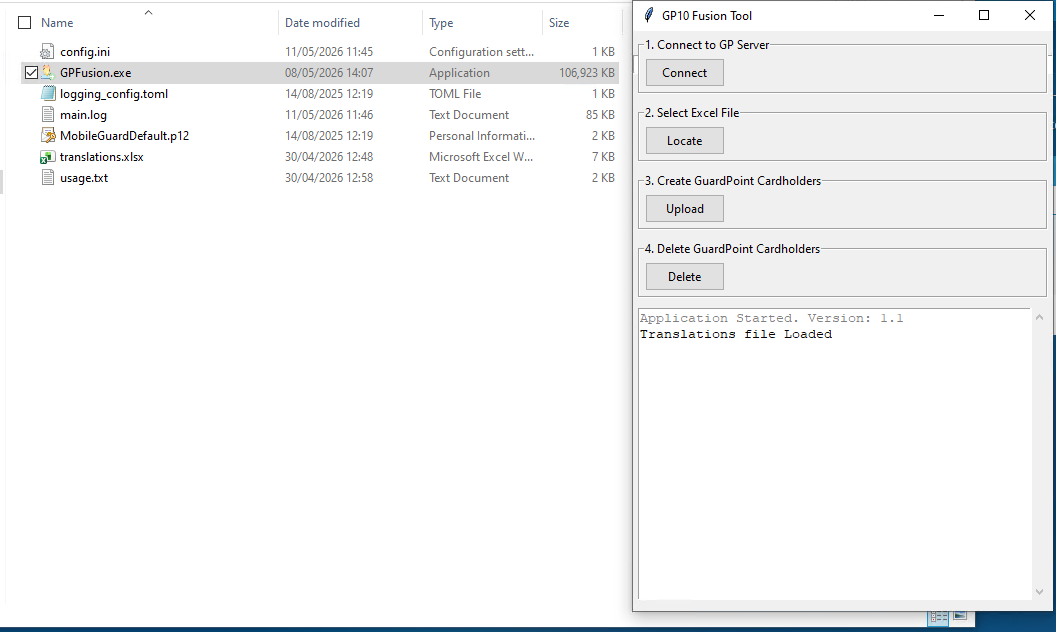
Graphical (GUI) Execution
GPFusion can be run directly using its graphical interface. This mode is intended primarily for initial setup and testing, allowing you to confirm API connectivity, validate the configuration, and verify that spreadsheet mappings are correct before moving on to automation.
The GUI uses the same config.ini file as the command-line version and performs identical validation checks; the difference is that feedback is presented immediately within the interface.
When using the GUI, the workflow is:
Connect to the GuardPoint 10 server using the API configuration defined in
config.ini.Browse to and select the Excel file containing the data to be processed.
Choose whether to upload or remove records, depending on the intended action.
If any part of the configuration or spreadsheet structure is incorrect, the tool will stop and report an error before processing begins: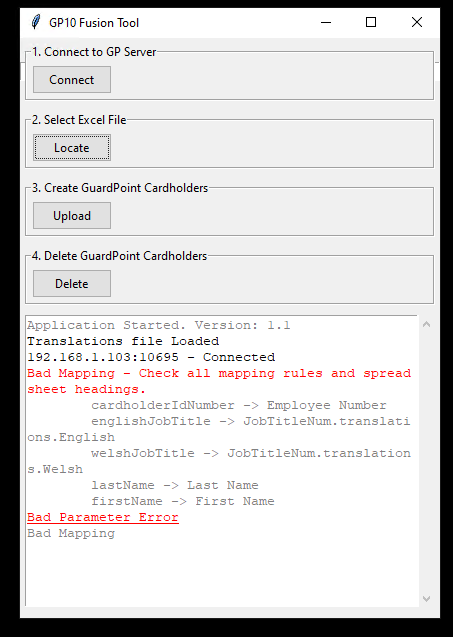
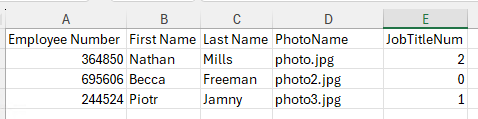
In the above example, the Fusion Tool is unable to run due to a mismatch in column names. If you see this error, make sure your column names in your spreadsheet match up with those in the Fusion config file. If you do not want to include some of the fields that are listed in the config file, make sure to comment them out (#) to stop the tool from looking for them.Below is a simple example of spreadsheet data used by the tool.
Note that the column headers must match exactly the names defined in the config.ini file (apart from the English/Welsh Job Title field which should show as 'JobTitleNum' in your spreadsheet):
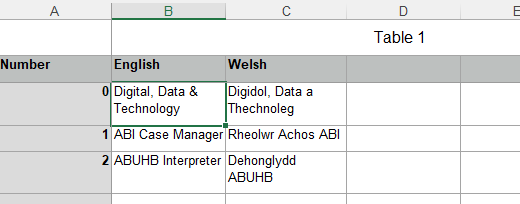
The JobTitleNum refers to the Translations spreadsheet which can be found in the GP10FusionTool zip file:
Any photos being used will need to be stored in the same location the GPFusion Tool. You will then reference the photo name within the relevant cell as shown below:

Alternatively you can reference the photos using their full path in the cell like this:

Deleting Cardholders:
- Follow the same process to Connect the Fusion tool to the GP Server
- Select the Excel File containing Cardholders you wish to remove from the system
- Choose the 'Delete' button within the tool. The interface will then confirm how many cardholders have been deleted

Using GPFusion via Command Line (CMD)
GPFusion can also be executed directly from the Windows command line. This mode provides full control over how the tool is run and is the foundation for later automation scenarios.
The command-line interface is documented in the usage.txt file supplied with the tool. This file should be treated as the authoritative reference for supported parameters and syntax, and it includes working examples.
At a high level, the tool supports the following operations when run via CMD:
CREATE
DELETE
INVALIDATE
Each operation is selected using a command-line parameter and relies on the same config.ini file described earlier.
Command-Line Basics
Before running the tool, you must first change directory to the location where GPFusion.exe is stored. This ensures the executable, configuration file, and any required supporting files are accessible.
Example:
Once you are in the correct directory, the tool can be executed by calling GPFusion.exe with the appropriate parameters.
Example Command
The following is a simple example command:

In this example:
The tool is executed from its installation directory
An operation is specified
An Excel file is provided using an absolute path
The
--archiveoption is enabled
We can verify if successful by looking in to main.log file or checking within our GP10 software.

Usage Reference
All available command-line options, including optional flags and alternative parameter combinations, are documented in the usage.txt file included with the tool. Rather than duplicating that information here, refer to this file when modifying or extending commands.
At this stage, the important points to understand are:
CMD execution uses the same configuration and validation logic as the GUI
The tool must be run from its own directory
Behaviour is fully controlled via command-line parameters
Creating Custom Commands Using Batch (.bat) Files
When the same GPFusion command needs to be run repeatedly, it is recommended to place the command into a Windows batch (.bat) file. This removes the need to manually open a command prompt, change directories, and retype the command each time.
A batch file is simply a text file containing one or more command-line instructions, saved with a .bat extension.
Why Use Batch Files
Using batch files allows you to:
Standardise commonly used GPFusion commands
Reduce the risk of syntax or path errors
Prepare commands for later use with automation tools
Keep execution consistent across different machines or users
Each batch file typically represents one specific task.
Example Batch Files
Below are two simple examples.
Example: CREATE operation
Example: DELETE operation
In both examples:
The working directory is explicitly set to the GPFusion installation folder
The required command is executed with predefined parameters
pausekeeps the window open so that output or errors can be reviewed
Creating a Batch File
To create a batch file:
Open Notepad
Paste the required command sequence
Select File → Save As
Set Save as type to All Files
Name the file with a
.batextension (for example,CreateCardholders.bat)Save the file
Once saved, the batch file can be run by double-clicking it or invoked by other systems.
Included Examples
The GPFusion tool folder includes a directory containing:
Example
.batfilesCorresponding
.txt/ Notepad versions for reference and editing
These examples can be copied and modified to suit specific environments, spreadsheet locations, or operational requirements.
Scheduling and Automating GPFusion Execution
Once GPFusion commands have been encapsulated into batch (.bat) files, they can be executed automatically without user interaction. This allows cardholder data to be synchronised on demand or on a defined schedule, using existing GuardPoint 10 features or standard Windows tooling.
If using this option to automatically create Cardholders, once the file has been executed and cardholders have successfully been created, the spreadsheet will be saved into an archive folder and renamed with a timestamp for easy reference.
Below talks through the two supported approaches for automating execution:
Scheduling via GuardPoint 10
GPFusion batch files can be executed directly from GuardPoint 10 using its built-in automation capabilities.
This method requires the Advanced Global Reflex (AGR) module, which enables the Run External Application action. Once licensed and enabled, GuardPoint 10 can trigger the batch file in response to events or schedules defined within the system.
Typical use cases include:
Running synchronisation on a time schedule
Triggering updates based on system events
Keeping all automation logic contained within GuardPoint 10

The Event Log will show whether the Global Reflex has occurred:

Scheduling via Windows Task Scheduler
Alternatively, GPFusion batch files can be scheduled using Windows Task Scheduler. This approach runs independently of GuardPoint 10 and is managed entirely at the operating system level.
Windows Task Scheduler allows batch files to be executed:
At fixed times
On a recurring schedule
At system startup or user logon
This option is useful where automation needs to occur regardless of whether GuardPoint 10 is actively in use.

Summary
This guide has covered the core concepts required to use GPFusion reliably and safely with GuardPoint 10.
We started by explaining the role of the config.ini file, which defines API connectivity and spreadsheet field mappings and is shared across all execution modes. We then introduced the two supported ways of running the tool: via the graphical interface for testing and validation, and via the command line for controlled and repeatable execution.
From there, we showed how command-line executions can be encapsulated into batch files to simplify reuse and prepare the tool for automation. Finally, we outlined the two supported automation paths: scheduling batch files from within GuardPoint 10 (using the Advanced Global Reflex module) or via Windows Task Scheduler.
Together, these components provide a flexible framework for integrating external spreadsheet data with GuardPoint 10, ranging from manual testing through to fully automated operation.
Download the tool here:
GP10FusionTool.zip - Note this is for GWENT use only
GPFusion - Telent.zip - Note this is for Telent use only
Was this article helpful?
That’s Great!
Thank you for your feedback
Sorry! We couldn't be helpful
Thank you for your feedback
Feedback sent
We appreciate your effort and will try to fix the article