GuardPoint10 & DOMPloy Configuration Guide for Sensor Access DESFire Cards
This guide outlines the process for configuring Sensor Access DESFire cards using the DOMPloy software and GuardPoint10 (GP10) system.
Step 1: Check DOM Handle, DOMPloy and GuardPoint10 Compatibility
All new DOM handles running firmware 6.x will support this setup. The feature is also available on devices running firmware 5.6 or later. If the handle is running an older firmware version, it should be updated using the DOM Update app before continuing. You should also make sure you are running the latest available version of DOMPloy [currently v26.01.00.2360] and the latest version of GuardPoint10 [currently v1.160.4]
Step 2: Set Up Template in DOMPloy
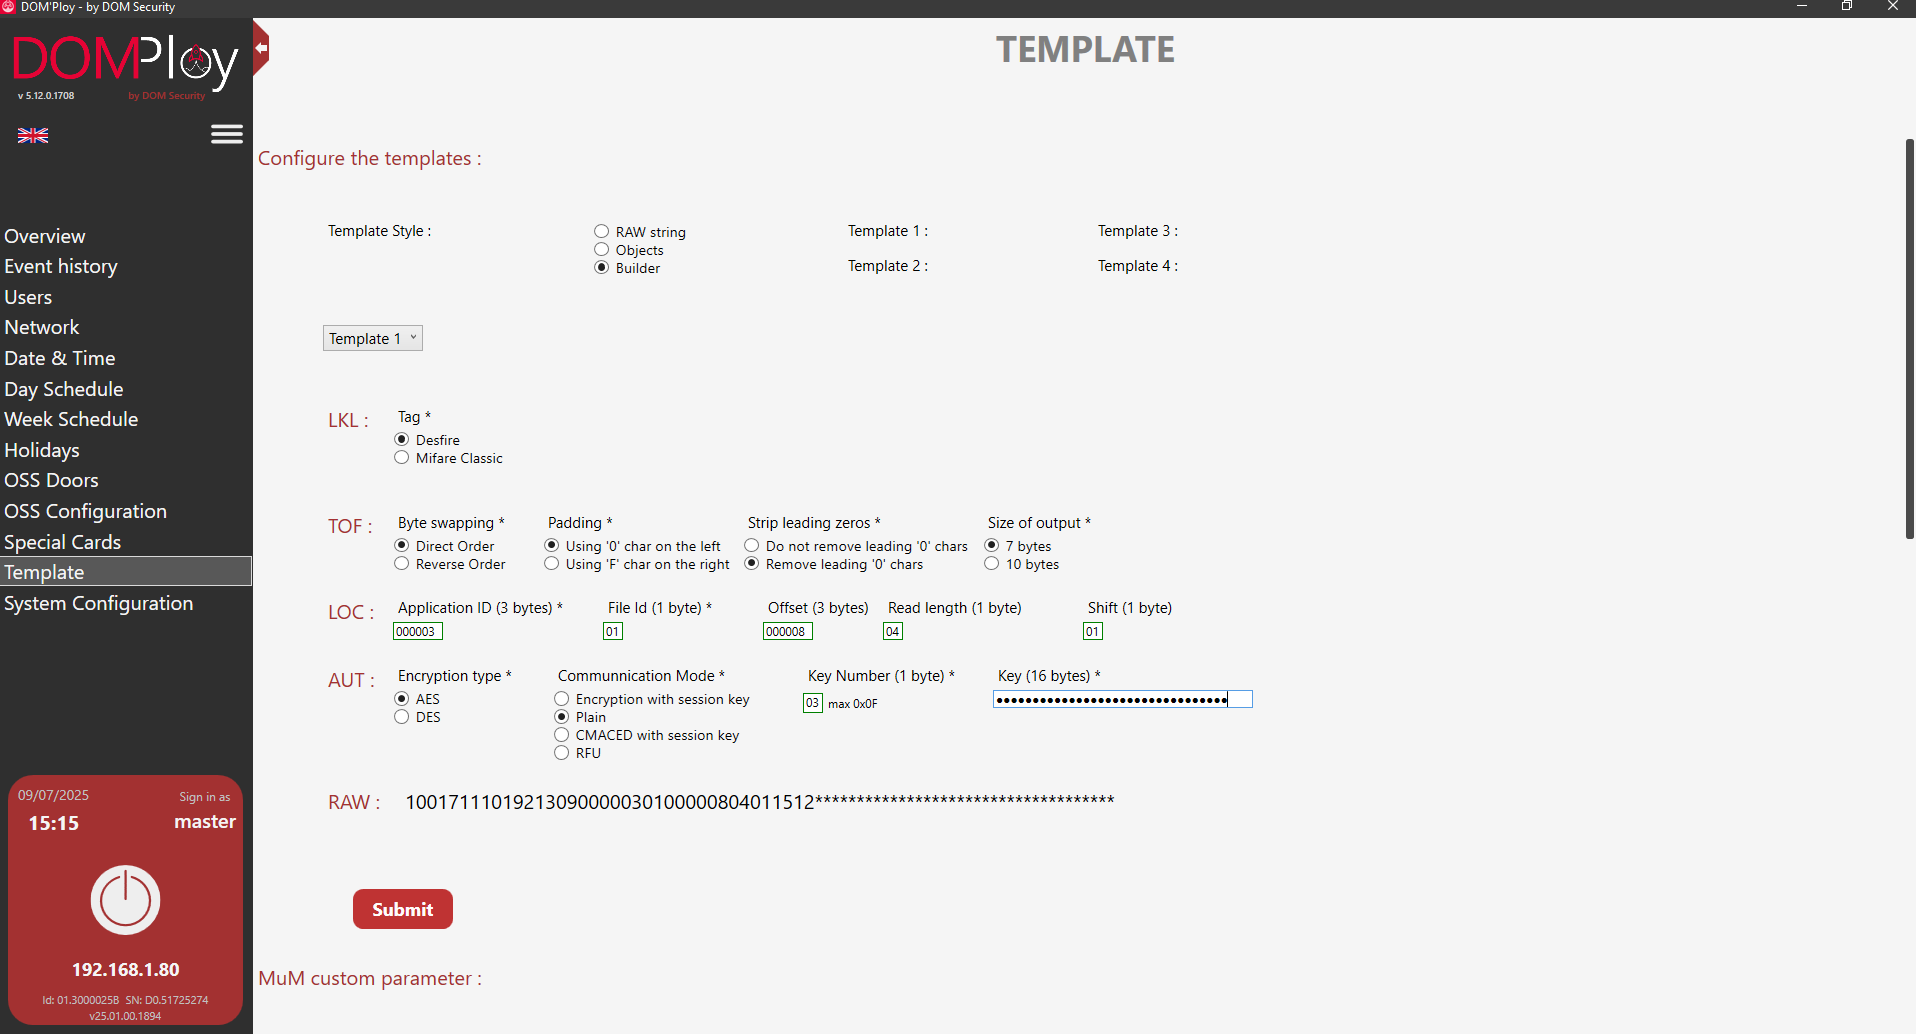
Before using the DESFire cards, you must first create a template in DOMPloy with the following configuration:
Field | Value |
Application ID | 000003 |
File ID | 01 |
Offset | 000008 |
Read Length | 04 |
Shift | 01 |
Key Number | 03 |
Key | ********************************* |
Communication Mode | Plain |
Step 3: Configure correct credential length.
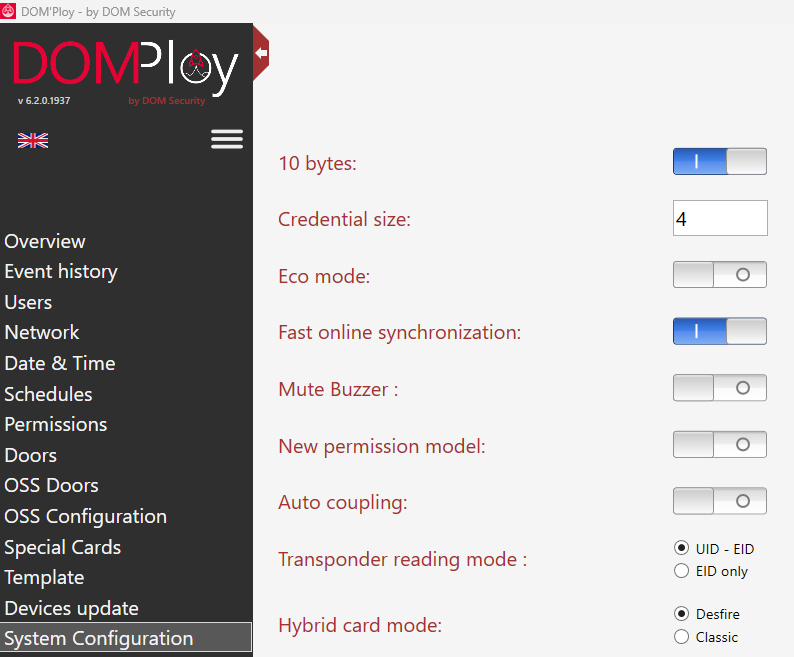
In System Configuration, enable the 10 bytes option. Then enter the required credential size for the card/credential being used, for example 4 for a 4-byte credential.
Reboot the DOM controller after making changes.
Step 4: Configure GuardPoint10 to Match DOMPloy Setup
- Stop NM Service:
- Open the Watchdog tool and stop the NM service. - Edit NMService Configuration:
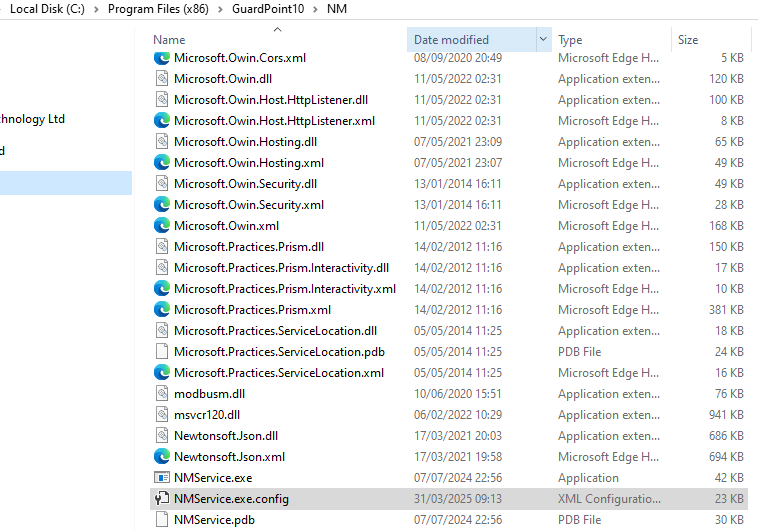
- Navigate to: C:\Program Files (x86)\GuardPoint10\NM\
- Open NMService.exe.config in a text editor (Run as Administrator).
- Modify the MIFARE Code Setting:
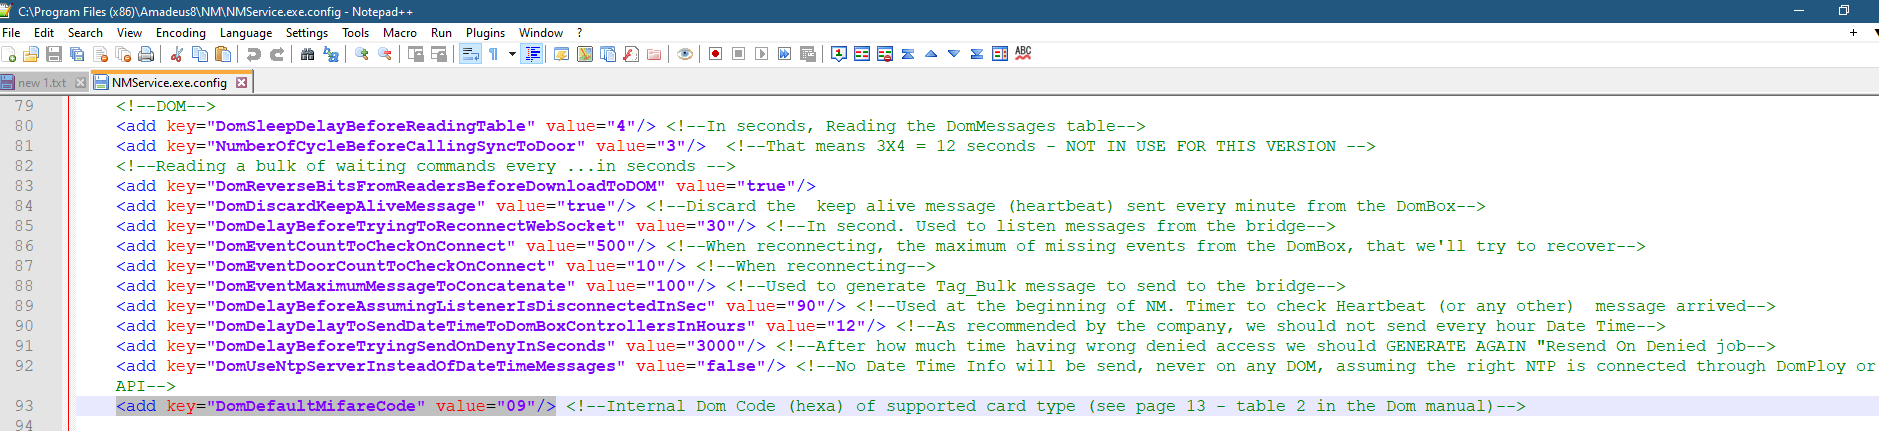
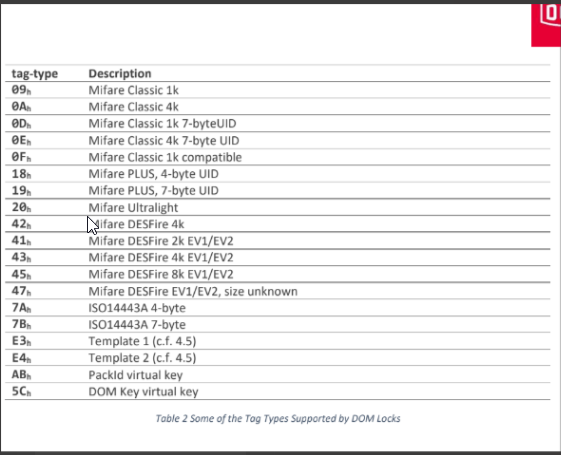
- Locate:
<add key="DomDefaultMifareCode" value="09"/>
- Change the value to match the DESFire tag type. Use value="E3".
- Save the Configuration File.
- Restart NM Service:
- Return to Watchdog and restart the NM service.
Step 5: Enrol and Assign DESFire Card
- Swipe a Sensor Access DESFire card on the DOM Lock reader.
- The badge code will be:
- Automatically read and captured by DOMPloy
- Simultaneously propagated to GuardPoint10

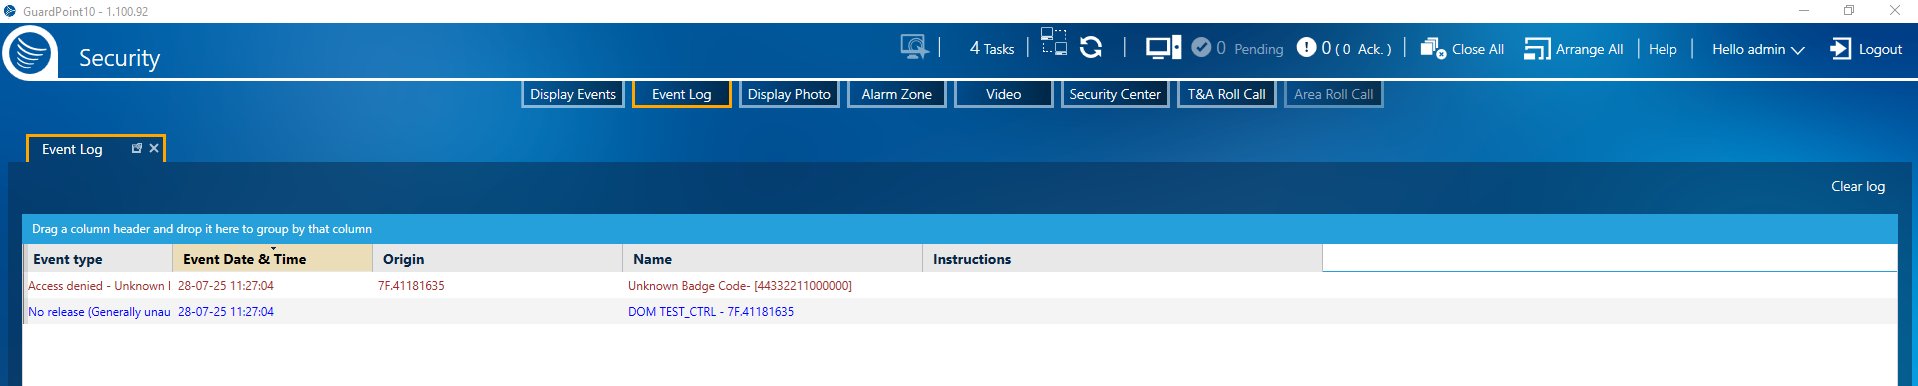
- In GP10, assign the badge to a user and configure access rights.
- Allow up to 5 minutes for GP10 to synchronise changes to the lock.
Step 6: Confirm Access
- Swipe the card again on the DOM Lock.
- No changes should be made in DOMPloy this time.
- Access should now be granted based on the permissions set in GP10.
Result:
The access rights have been pushed from GP10 to DOMPloy and then to the lock, completing the setup cycle.

Was this article helpful?
That’s Great!
Thank you for your feedback
Sorry! We couldn't be helpful
Thank you for your feedback
Feedback sent
We appreciate your effort and will try to fix the article