GuardPoint10 Visitor Management System
Sensor VMS Version 2.1.9
Version 2.1.9 includes the Guest sign-option and HTTPS certificates.
This Guide is split into the following sections:
- Introduction
- GP10 Configuration
- VMS Configuration
- Running the VMS as a service using the NSSM.
- Installing HTTPS Certificate onto browser
- Using STid - API Details
I. Introduction
Our Visitor Management System simplifies the process of managing visitors to your site. With a variety of options to choose from, visitors can sign in and receive badges in the form of QR codes, which are emailed directly to their smartphone. This enables them to gain secure and contactless access to your building without the hassle of issuing physical cards. We also offer customisable options to suit your requirements.
Our current methods include:
- Pre-booking an appointment to visit, including sign-in upon arrival.
- Signing in of "guest users" who do not require a user to be added to the system.
The VMS allows visitors to pre-book their visit via a registration page, where they can also accept custom terms and conditions, GDPR and health & safety policies with a signature. Once accepted, visitors receive an email notification containing a QR code to their phone. You can be notified upon the visitor's arrival and generate reports on their movements through GuardPoint 10.
If you have specific requirements, please feel free to get in touch. Our system is highly customizable to meet your needs.
The latest version of VMS can be downloaded from the following link: VMS 2.1.9
II. GP10 Configuration
- You will need the GP10 API module. You can check by going to Help > License and checking under Registered License.

- Enable API for the GP10 users who will be logging into the VMS:
Press on a Sensor access logo (left corner), then go to:
Management > Users tab > Allow API.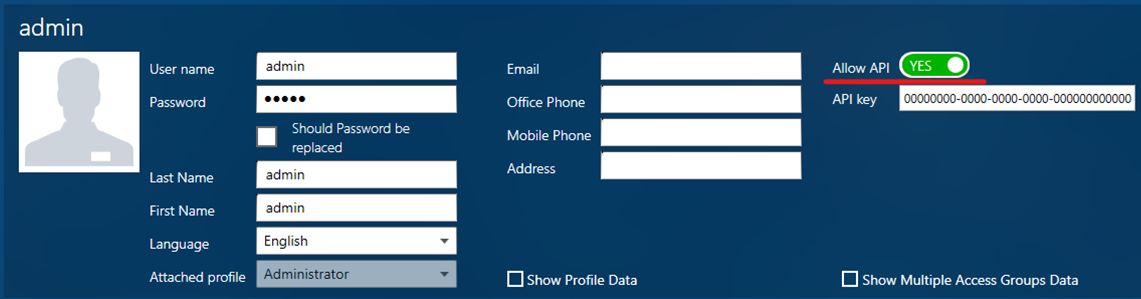
In the Options tab > General screen, make sure Allow duplicate names is enabled.

- Go to Cardholders, then Customized Fields.
Create 5 Text fields named Host Name, Visit Purpose, Host Signature, Visitor Signature and Tenant Email.
Create a Yes/No field named NDA Agreed. > Press 'Save & Close'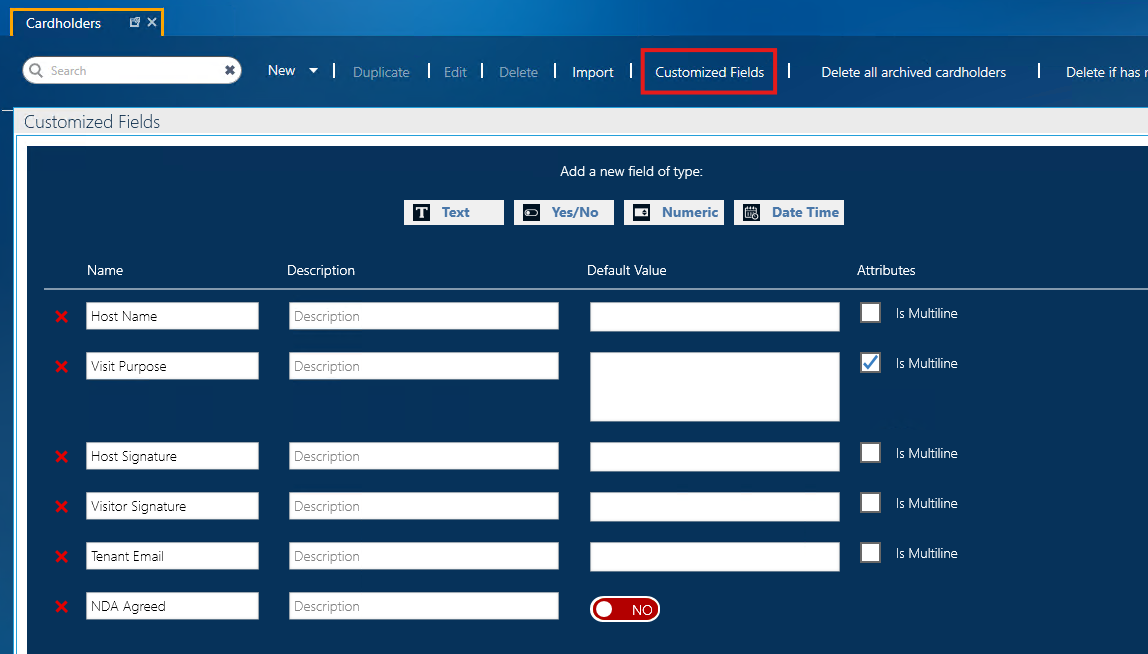
Warning: If you already have existing custom fields, please contact us for further instructions.
III. VMS Configuration
1, Download VMS 2.1.9,
Extract it and place the folder in C:\Sensor Access VMS\VMS 2.1.9
2, Server-config.ini
The Server-config.ini located in the VMS root folder file
(typical location: C:\Sensor Access VMS\<VMS latest version>\_internal ).
Default VMS Ports
For a standard local VMS installation, the recommended default ports are:
- HTTPS: Port 443
- HTTP: Port 80
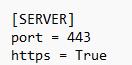
When HTTPS is enabled, the normal local VMS address will therefore be:
https://localhost:443
When HTTP is being used instead, the normal local VMS address will be:
http://localhost:80
The port configured in Server-config.ini must not already be in use by another application or service. For example, Microsoft IIS may already be using port 443 or port 80. If the required port is already in use, an alternative port can be configured.
**Warning! If you have this message:
 **Then you can/need to change port number in Server-config.ini to port:448.
Below screen shot example of the VMS running but the port is in use by IIS:
https = True
# OPTIONAL, REQUIRED, NONE
https_client_auth = OPTIONAL
debug = True
multi_threaded = True
file_log = False
cache_ttl = 3600
config_dir = company-configs
client_config_key1 = 8dgrXG95Ndagp32bcR2NJDieiZrhXCFH9p6sxIksrs4=
system_admin_emails = john.owen@countermac.com, josh@sensoraccess.co.uk, robert@sensoraccess.co.uk
# For Server Notification Emails
[SMTP]
provider = sendgrid
username = apiKey
password = ENC.gAAAAABkQmEeQa3wm6kGMgL1Svgx-PozBmzOqc4XjE0EIVOO7sGLwQgX5lG-wYc9Wyn9E3RpKojE7XdZLw_rPGRnEQcwh3vrjHqNcm5iz9yChS8_eT9nMmSPDBjTIcwTRRvosNDSdbKTNhGLCtG3aJP9WeDdgnhF7ZMPiEv37O7QL9UwH_cJdlw=
server = smtp.sendgrid.net
port = 587
[HTTPS]
key_file = keys/server-ecc.key
cert_file = keys/1625853244.crt
ca_file = keys/root.crt
3. DefaultCompany-Config
Located in the company-configs folder is the DefaultCompany-Config.ini this contains the main setting for the VMS.
Any setting in the browser P12 certificate will overwrite the setting in here. Any setting not included in the certificate the VMS will look for it in the DefaultCompany-config.ini
update the base_url to use local host:
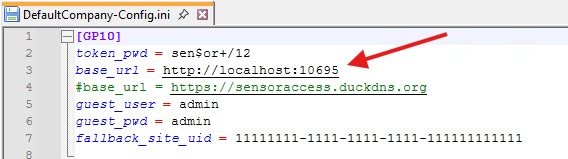
If you use the Guest Sign-in and Sign-out screens you will also need to set the area for both. Make sure this is exactly written to the same as in GP10
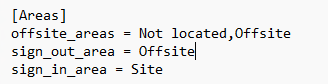
4. Configuring the Tenant Email Address
The VMS uses the tenants.txt file to define the tenant/company name and the email address associated with it.
The file is located in:
C:\Sensor Access VMS\VMS-x.x.x\_internal\company-configs
Open the following file in Notepad:
tenants.txt
Each entry must be formatted as:
NAME, EMAIL
For example:
Sensor Access, reception@sensoraccess.co.uk
Replace the default email address with the email address required for the site.
Important: Keep the comma between the tenant/company name and the email address.
Save and close the file when complete.
IV. Running the VMS
- When you are done, save and close all of your config files.
- Start the VMS server application. You should see the following console screen.
(The VMS exe may have a different name or logo depending on branding)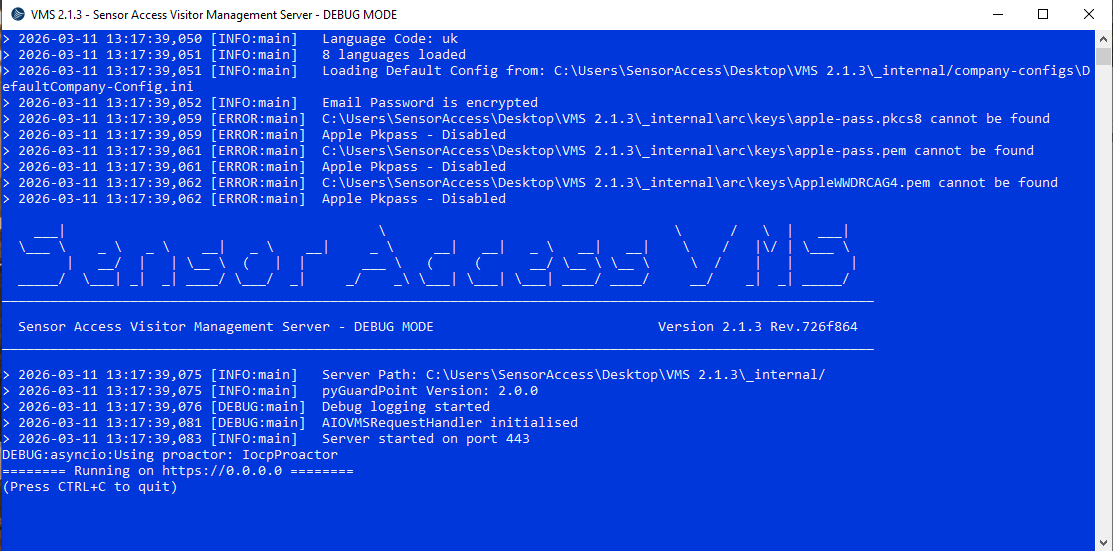
- You can now connect to the web interface with the server’s IP address / name and the port number.
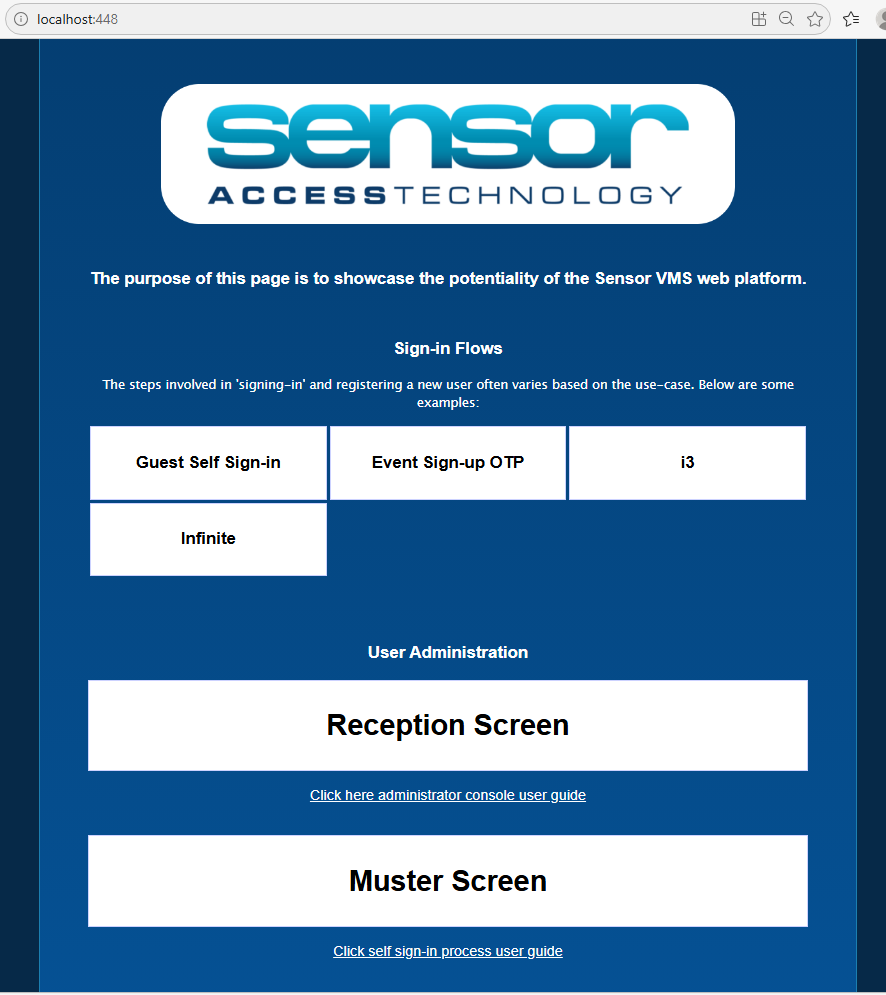
If the console screen shows any errors, please double check the settings are correct and let us know at support@sensoraccess.co.uk.
V. Running the VMS as a service using the NSSM.
By default the VMS server runs in the foreground and requires the user to be logged in to stay active.
If the user logs out the application will be terminated. By using a free and public domain tool called “NSSM” we are able to package VMS as a service thus allowing it to run in the background even when user is logged out
The tool can be found here and is called NSSM (The Non-Sucking-Service-Manager)
nssm-2.24
Sensor_VMS_Installation_Guide.pdf
1. Extract and place the NSSM Folder into C:\Sensor Access VMS
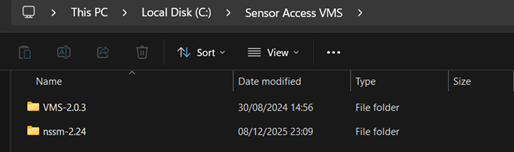
2. Install VMS as a Windows Service using NSSM
NSSM can be launched via an elevated Command Prompt with the following command:
C:\Sensor Access VMS\nssm-2.24\win64>nssm.exe install
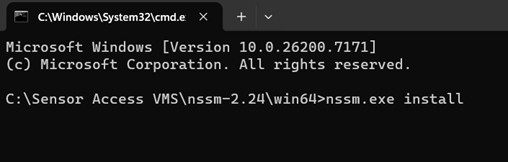
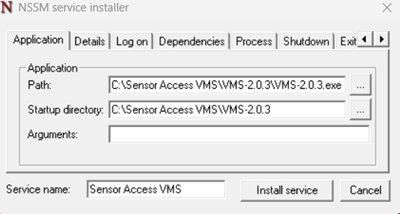
Inside the NSSM GUI, configure the following fields:
Application Path:
C:\Sensor Access VMS\VMS-2.0.3\VMS-2.0.3.exe
Startup Directory:
C:\Sensor Access VMS\VMS-2.0.3\
Service Name suggestion:
Sensor Access VMS
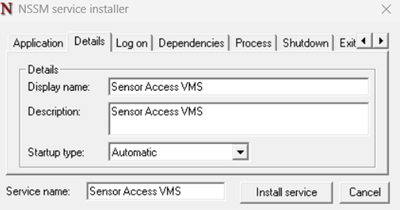
Leave Log On as Local System unless otherwise required. Click Install Service when complete.
3. Start and Verify the Service
Start service via command line:
sc start Sensor Access VMS
Or start it via Services (services.msc). Ensure Startup Type is set to Automatic.

Test in browser:
https://localhost:443
VI. Install VMS as an APP via Edge Browser.
Before installing the VMS as an Edge application, decide which VMS page you want the application shortcut to open. By default, the installed VMS application opens the Reception / Visitor Sign-In page.
This behaviour is controlled by the following file:
C:\Sensor Access VMS\VMS-x.x.x\_internal\www\vms-admin.webmanifest
Open vms-admin.webmanifest using Notepad.
The default file contains:
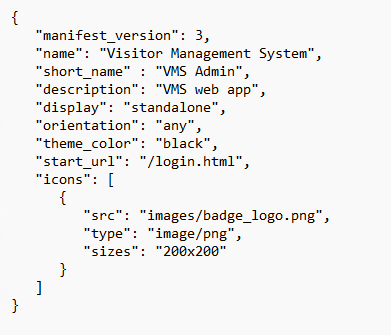
The following setting determines which page opens when the VMS application is launched:
"start_url": "/login.html" Reception / Visitor Sign-In Screen | "start_url": "/index.html" Main VMS Landing Page |
If the installed application is intended for an administrator or other user who should be taken to the main VMS landing page, change the setting to:
"start_url": "/index.html"
Save and close the file after making the change.
You can then install the VMS as an application through Microsoft Edge.
Open in edge browser:
https://localhost:443
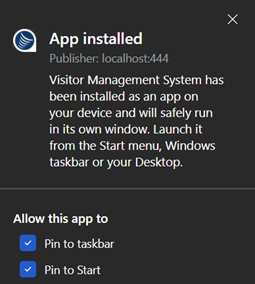
Go to  -> More Tools -> Apps -> ‘Install Visitor Management System’
Confirm and pin to taskbar.
VII. Installing HTTPS Certificate onto browser
Please see the following guide on how to install the certificate depending on your browser:
VIII. Using STid - API Details
Make sure when setting up VMS with STid that it links to the correct STid API account in vms-config.
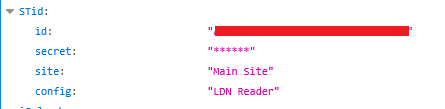
You can find your API ID and Secret in the appropriate STid portal login.
Settings -> Administration-> API
Was this article helpful?
That’s Great!
Thank you for your feedback
Sorry! We couldn't be helpful
Thank you for your feedback
Feedback sent
We appreciate your effort and will try to fix the article